It's getting really hot here. I live in South Korea and the summer is almost tropical. Last year my video card burned out, hopefully it's not going to happen again. :)
Anyway, I've been working on some new monsters to take advantage of the new Giant Rat agent archetype. I've tried to keep the absolute number of archetypes to a minimum, as many monsters as possible share armatures and animations to help save development time.
The Giant Rat has spawned 7 different monsters.
One of my favorites is the Cockatrice:
One of the places most associated with the original tale of the cockatrice, Wherewell near Andover, is just a few miles from my hometown in England. When I read about it I was quite homesick, I remember the many warm (but not tropical) summers I spent riding out to that small town where the cockatrice was said to have lived in a well. I used to swim in the stream with my friends and dry out in the sun with not a soul around for miles and miles.

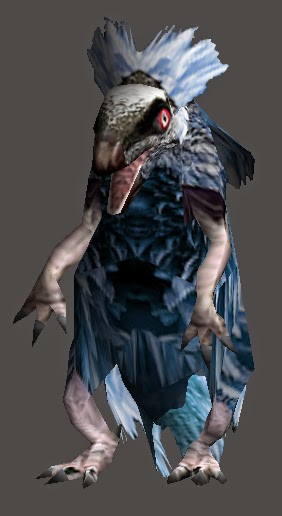
Anyway, I've been working on some new monsters to take advantage of the new Giant Rat agent archetype. I've tried to keep the absolute number of archetypes to a minimum, as many monsters as possible share armatures and animations to help save development time.
The Giant Rat has spawned 7 different monsters.
One of my favorites is the Cockatrice:
A dangerous monster from the lower levels.
Click for a video of the other monsters.
Click for a video of the other monsters.
One of the places most associated with the original tale of the cockatrice, Wherewell near Andover, is just a few miles from my hometown in England. When I read about it I was quite homesick, I remember the many warm (but not tropical) summers I spent riding out to that small town where the cockatrice was said to have lived in a well. I used to swim in the stream with my friends and dry out in the sun with not a soul around for miles and miles.
I've also been working on the prefab editor which is up to version 6 now. I made some changes so map display is independent of indexes, but is rather gathered from a set of single letter strings in a look up dictionary. This means I can change the indexes as much as I want, adding or taking away different types of tiles as long as I keep the reference dictionary up to date.
Comments
Post a Comment